How to Add the Facebook Pixel to Your Campaign
Learn how to add the Facebook Pixel to your Campaign and track the conversions of your Facebook ads.
Campaigns are usually more successful when you spend some money to promote them. One of the most popular (and cost effective) ways to get the word out about a Campaign is to invest in Facebook ads. But how do you truly know if your paid advertising efforts are resulting in Campaign conversions? We have the answer to this frequently asked question. Facebook recently announced some changes to their conversion pixel. They used to have two different pixels; website pixel and conversion pixel. They've combined the two to make a "one-pixel solution" called the Facebook Pixel. In this post, we’ll explain step-by-step how to add the Facebook Pixel to your Campaign so you can track the conversions of your Campaign’s Facebook ads. Let’s get started!
Step 1: Set-Up Your Facebook Pixel
Go into your Ads Manager and do the following:
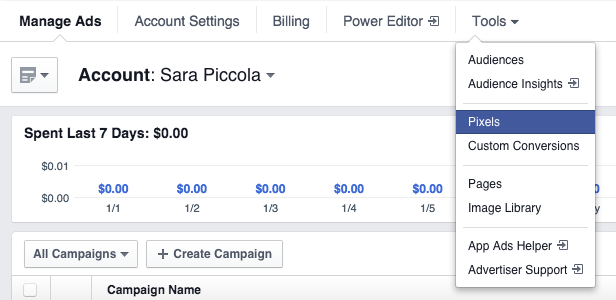
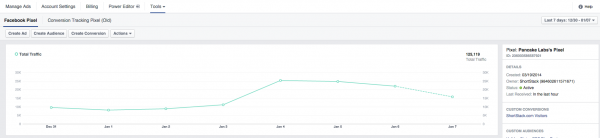
1. Click "Tools" then Pixels to get to the Facebook pixel dashboard.
2. If you've never set up a Facebook pixel before, Facebook will prompt you to create a new pixel. If you had previously set-up conversion tracking you will see a new tab called "Facebook Pixel" and the previous pixel tab, now called "Conversion Tracking Pixel (Old)."
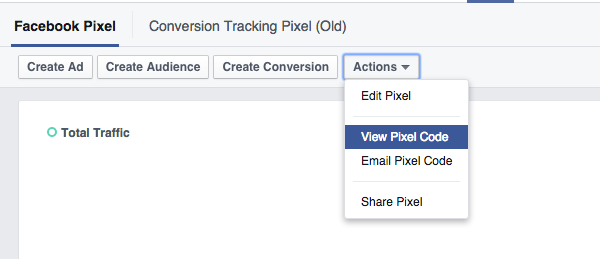
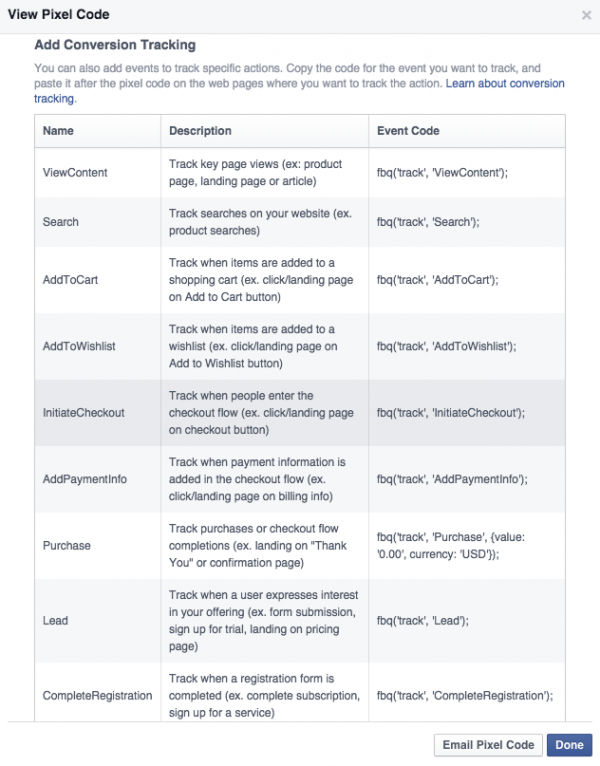
3. Once your pixel is set up, click "Actions" then "View Pixel Code."
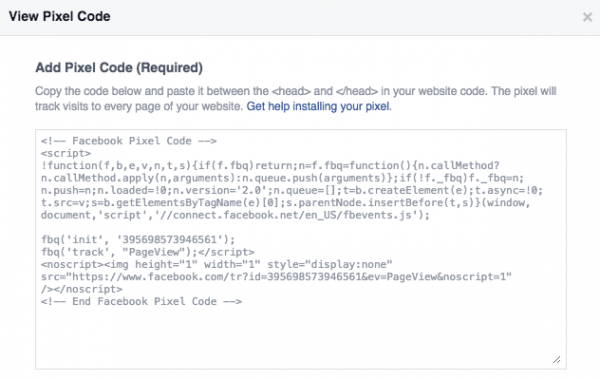
4. Copy the code that Facebook gives you in the the top box (in step 2 you will embed it into your Campaign using ShortStack’s Code Widget). Until your code has been placed, its status will be “Unverified.”
Step 2: Set Up Your Campaign for Conversion Tracking
By default, the Facebook Pixel will track Page Views, but Facebook has 20 different conversions you can choose from.It's best to take a look at the conversion options and decide which one will best fit your needs. A majority of ShortStack users stick with the default Page Views.
Where to Place Your Tracking Code on Your Campaign
When you're tracking conversions on your website, you place your pixel code in between the main head tags.Because we’re tracking conversions on a Campaign -- not on a traditional website -- you have to use ShortStack’s Code Widget to manipulate when your conversion tracking pixel fires to track a conversion.
Let’s walk through an example:
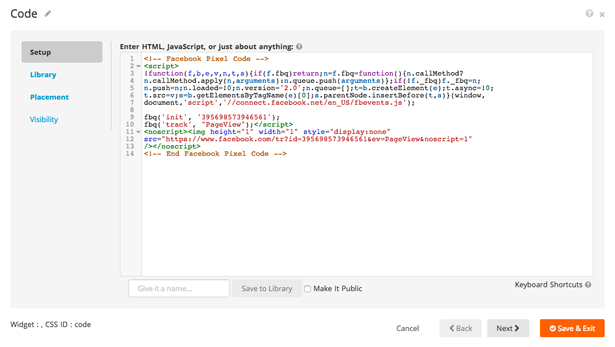
Step #1 Open up your Campaign within ShortStack’s Campaign Builder and click on the Code Widget. In the Code Widget, paste your conversion tracking pixel (the piece of code Facebook provided you in step 1 in the open field.
*If you're only collecting Page Views, skip the next step and go straight to the step #3. If you're using a different conversion then view the next step.
Step #2 Head back into the View Pixel Code window in the Ads Manager and get the code to add the "lead" conversion to your pixel.
You'll head back to the Code Widget and add the lead tracking into your code where it currently says fbq('track', "PageView"); the new code would read fbq('track', 'Lead');
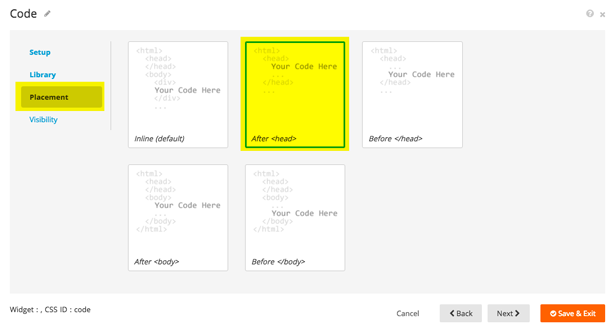
Step #3 While still in the Code Widget, click on "Placement" then click on "After <head>. "Click "Save & Exit" and that's it!
To verify your tracking pixel, publish or refresh your live Campaign. Now go back into the Ads Manager, and under the "Facebook Pixel,” confirm that the status of your Campaign’s tracking pixel is Active (green).
By pasting your exact conversion tracking pixel on your Campaign using the Code Widget, your pixel will fire each time a user lands on your Campaign.
Step 3: Create Your Facebook Ad
Now that you’ve created and successfully placed your tracking pixel on your Campaign, it’s time to create your Facebook ad.
To create a Facebook ad that tracks your Campaign’s conversions, follow these steps:
1. Go into the Ads Manager and in the top right corner select “Create Ad.”
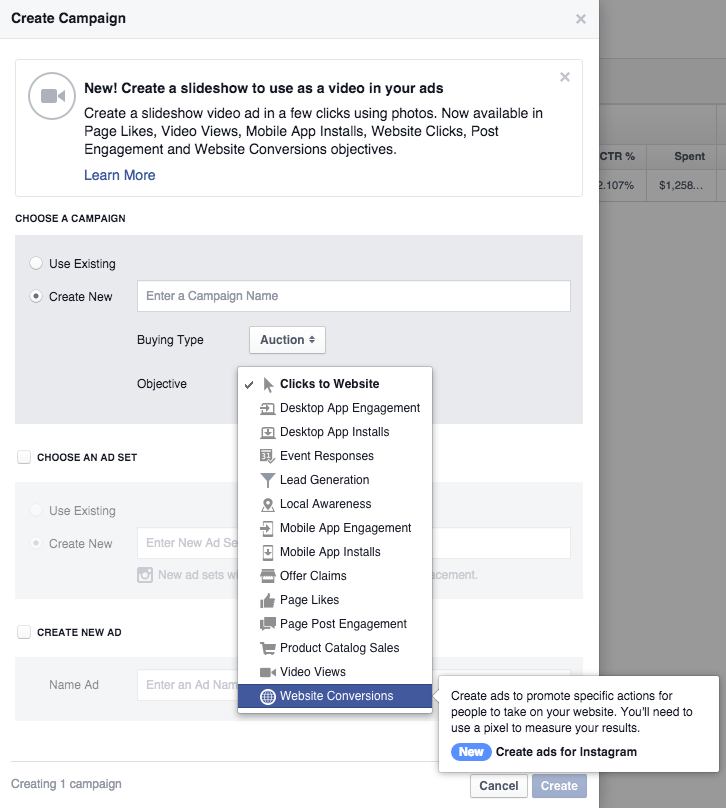
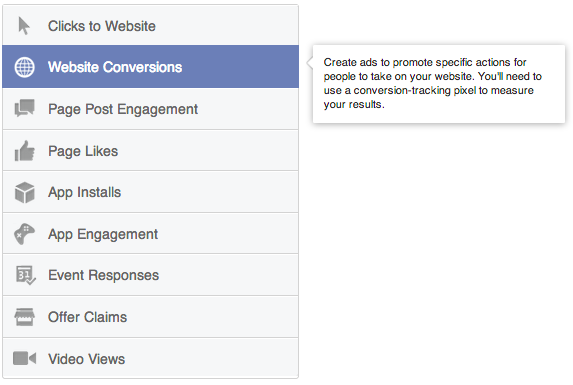
2. Choose “Website Conversions” as your ad’s objective.
3. Paste your Campaign’s URL (make sure you use the Campaign URL provided by ShortStack when you publish) in the open field and select your Facebook Pixel in the drop-down menu.

4. After you’ve pressed “Continue,” customize your ad as you normally would.
Note: You can follow these same steps in the Power Editor, the process will just look different. Start in the top left hand corner where it says "Create Campaign." Create a new Campaign and choose the "Website Conversions" objective.

Have questions? Please email theteam@shortstacklab.com.