Entry Display Widget
The Entry Display Widget is used to showcase entries submitted via a Form Container Widget or through Feeds. It also allows you to enable voting for voting contests.
Overview
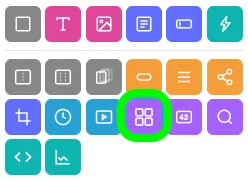
Adding the widget
To add the widget to your campaign:
- Click the Entry Display Widget icon in the Add Widgets Panel.
- Drag and drop the icon into your preview area or the Edit Widgets Panel.
Widget settings
The Widget Settings pop-up allows you to customize the Entry Display Widget.
Key settings information
Widget name
Click the pencil icon in the top-left to rename the widget.
CSS ID
View the widget’s CSS ID (starting with a #) in the top-right corner.
Navigation
Use the menu on the left to configure each section of the widget.
Use the Back and Next buttons at the bottom to navigate through settings.
Saving changes
Click the blue Save and Exit button to save your changes.
List display
The List Display section connects your widget to an entry source.
Connect to an existing source
Click the link after Connect to Existing Source and select your list from the pop-up.
Create a new Entry Source
- Click Create New Entry Source.
- In the pop-up, enter a name, the number of test entries, and tags.
- Click Create.
- Once you have finished setting up the Entry Display Widget, create a Form Container and connect it to the list you just created.
Learn more about the Form Container.
Display options
Control how entries are shown in the widget:
Sorting
Use the Sort entries from to sort entries by:
- Newest to oldest
- Least to most votes
- Most to least votes
Entries per page
Specify the number of entries displayed per page (maximum: 30). If you need to display more, please contact support.
Filtering
The Filtering section offers options to display specific entries:
- Hide Unapproved Entries: Only display entries verified by your team.
- Filter by Votes/Points: Show top entries based on votes. Select the voting round and number of top entries to display.
- Filter by Category: Display entries by category. Leaving the category field blank allows dynamic filtering via Action Widgets.
- Filter by Label: Showcase entries with specific labels (e.g., for winners).
Advanced options
Disable pop-up showing referred/shared entry.
Voting
Enable public voting on entries through the Voting section:
Enable voting
Check the Enable Voting box.
Display options
Choose to show total votes, percentage of total votes, or hide vote counts.
Voting Rounds
Configure voting rounds for multi-round contests in the Filtering section.
Schedule voting
Set the voting start and end dates
When you schedule voting to begin and end at specific times, the vote button will only appear during that period. Use this setting to show entries before or after voting if needed.
Adjust the campaign’s time zone for accuracy.
Voting restrictions
Enforce rules for voting in the Restriction section:
- No Restrictions: Unlimited votes per visitor.
- Anonymous Fingerprint: Restricts votes using anonymized browser and IP data.
- Email Address: (Available on Max plan) Voters submit and verify an email to vote.
Frequency limits
Specify how often users can vote by entry, category, or list.
Define restrictions by days, hours, minutes, or seconds.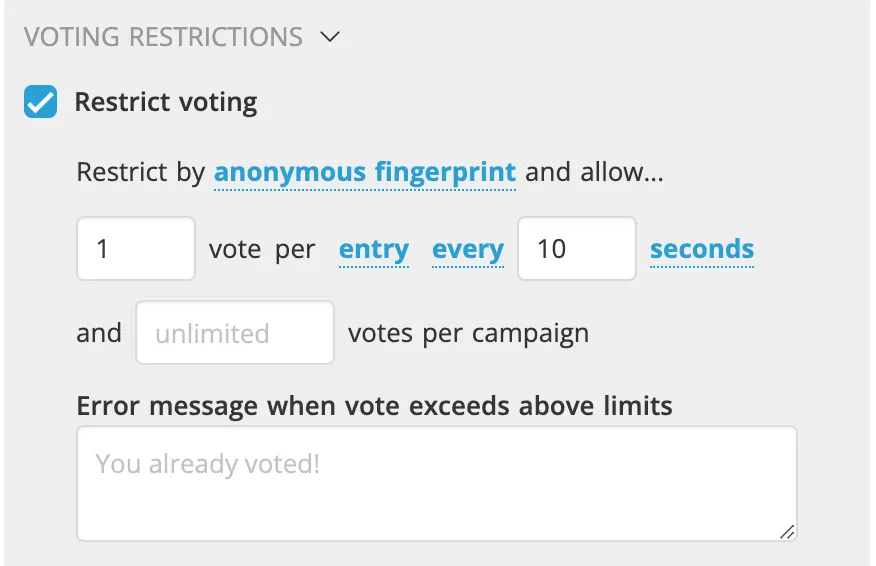
Google reCAPTCHA
Available on Scale Plan and higher.
Enable Google reCAPTCHA to reduce spam and illegitimate votes:
- Click the link labeled Configure in Campaign Settings → Security.
- Click the Choose Profile button.
- Select an existing profile, or click the Add button to connect a new set of keys.
- Check the box for Enable Google reCAPTCHA.
- Use the Sensitivity Level slider to adjust the strictness of the verification.
Learn more about How to Create Google reCaptcha Keys.
Advanced settings
Depending on your user-flow for your campaign, you may want to:
- Start with Vote Button Hidden- Hide the vote button until an action occurs (think Form Submission). See the Action Widget for more details.
- Re-enable Vote Button after voting- You can determine the wait time between when the vote button reappears.
Fields
Control the fields shown in the entry tile and pop-up view.
Standard fields
The following fields can be shown in the Entry Display Tile:
- Entrant Name
- Entry Title
- Entry Description
- Entry Category
- Media
Custom fields
If you have additional custom fields, such as a text field, this can only be viewed in the pop-up view of the tile. All custom fields will be displayed in this tab, and you can check to enable them in the pop-up view or not.
Share
Fine-tune sharing settings in the Sharing section.
Enable sharing
Check the box to allow sharing.
Custom settings
Toggle between entry and custom settings for titles, descriptions, and images.
Social media channels
Drag and drop to arrange channel order. Customize each channel’s settings individually.
Visibility
Control when and where the widget is visible:
- Limit visibility by date, time, or geographical location.
- Make the widget a pop-up.
Learn more about Widget Visibility.
Extras
Learn about the Main Tag, CSS Classes, and Smart Labels settings here.
Multi-round voting
You can create up to 3 rounds of voting, in each round narrowing down the entries to vote on. Here's how:
1. Add and rename Entry Display Widgets
- Add three Entry Display Widgets to your campaign.
- Rename each widget: Round 1, Round 2, Round 3.
- Connect each widget to the same List for the contest.
2. Configure round 1
- Open the Round 1 Entry Display Widget settings.
- Open the voting section and enable voting.
- Set the voting round to Round 1 and specify the timeframe.
- Save and exit.
3. Configure round 2
- Open the Round 2 Entry Display Widget settings.
- Expand the filtering section and check "Filter by votes/points."
- Select voting round 1.
- Enter the number of top entries to display in the field. Click Next.
- Enable voting.
- Set the voting round to Round 2 and update the timeframe.
4. Configure round 3
Repeat the steps above as listed in Configure Round 2, however, remember:
- Change step 3 to voting Round 2
- Change step 6 to voting Round 3
5. Update visibility
Adjust the visibility settings for all widgets to show only during their respective voting rounds.
Entry display styling options
When the Widget is selected, you can customize the styling of the specific widget. Some of the options include changing the number of columns, tile color, media navigation icons, the maximum width of the widget, and widget alignment. You will see the following areas of styling available in the Style Panel:
- Columns
- Entry Tile
- Entrant Name
- Vote Count
- Category
- Title
- Description
- Custom Fields
- Vote Button
- Sharing
- Load More
- Pop-Up: General
- Pop-Up: Media
- Widget
FAQs
Can a voter undo a vote?
No, once the voter clicks on the vote button, the vote has been cast. The voter can email you, and you can manually update the vote count for the entry in the Entries Manager.
Learn more about Adjusting Votes.
How can I prevent bots or fraudulent votes?
The most secure method of vote restrictions is the Email Login option. This is available on the Max Plan. Additionally, requiring voters to enter their name and email address into a form drastically reduces the likelihood of fraudulent votes. As a bonus, when using a form, you will collect more leads!
How do I set up voting restrictions?
Let's look at the following example: You can vote a maximum of 10 times a day, with one vote per entry.
- Open the Entry Display Widget settings and access the Voting tab.
- Enable Voting Restrictions.
- Change the total number of votes to 10.
- Click on the blue text entry or category to change it to list.
- Click on add interval...
- Change the interval number to 1.
- Click on hour and select day.
- Save and exit.
Related resources
3 Types of Video Contests for Instagram and Facebook (Blog)
How to Set Up Voting (Help Doc)
Using the Label Filter to Display Specific Entries (Help Doc)
Was this helpful?
Thanks — that helps us decide what to fix next.
Sorry this missed. Tell us what you needed and we'll get you an answer — and fix the page.